Integration guide
This guide walks you through how to integrate Hubpay’s Hosted Payment Page (HPP) into your application or website. You’ll learn how to create a payment link, redirect customers to our secure checkout page, and handle the result using redirect URLs and optional webhooks.
💡 To get started, you’ll need API credentials and access to the Collections API. See our Authentication Guide for more details.
1. Create a payer (if required)
If you haven’t already created a payer previously, you’ll need to do so before initiating a payment request.
🔄 Skip this step if you already have a
payerId.
📘 View API Reference → Create Payer
A successful response will return a payerId, which you can then use in the next step.
2. Create a payment request
Use the API to create a new payment request:
📘 View API Reference → Create Payment Request
A successful response will include key URLs:
{
  "paymentLinkUrl": "https://pay.hubpay.ae/AH-VGTJ-24GX",
  "successRedirectUrl": "https://yourapp.com/success",
  "cancelRedirectUrl": "https://yourapp.com/cancel"
}
✅ On success redirection, Hubpay will append the paymentRequestId and paymentId as query parameters to
your successRedirectUrl, allowing your backend to verify and retrieve the payment details. For example:
https://yourapp.com/success?paymentRequestId=8a282576-18c0-4c0e-b158-44b92eda1afe&paymentId=46be2ff1-cdbf-4b3d-a4cd-beb0fb22ea0d
3. Redirect the customer
Redirect the user to the paymentLinkUrl, for example:
window.location.href = paymentLinkUrl;
📱 For use in React Native you can use react-native-webview to display the paymentLinkUrl in a web view – ideally in a full-screen view:
<WebView
    source={{ uri: paymentLinkUrl }}
    onMessage={handleMessage}
/>
After the redirect they will be presented with a page similar to below:
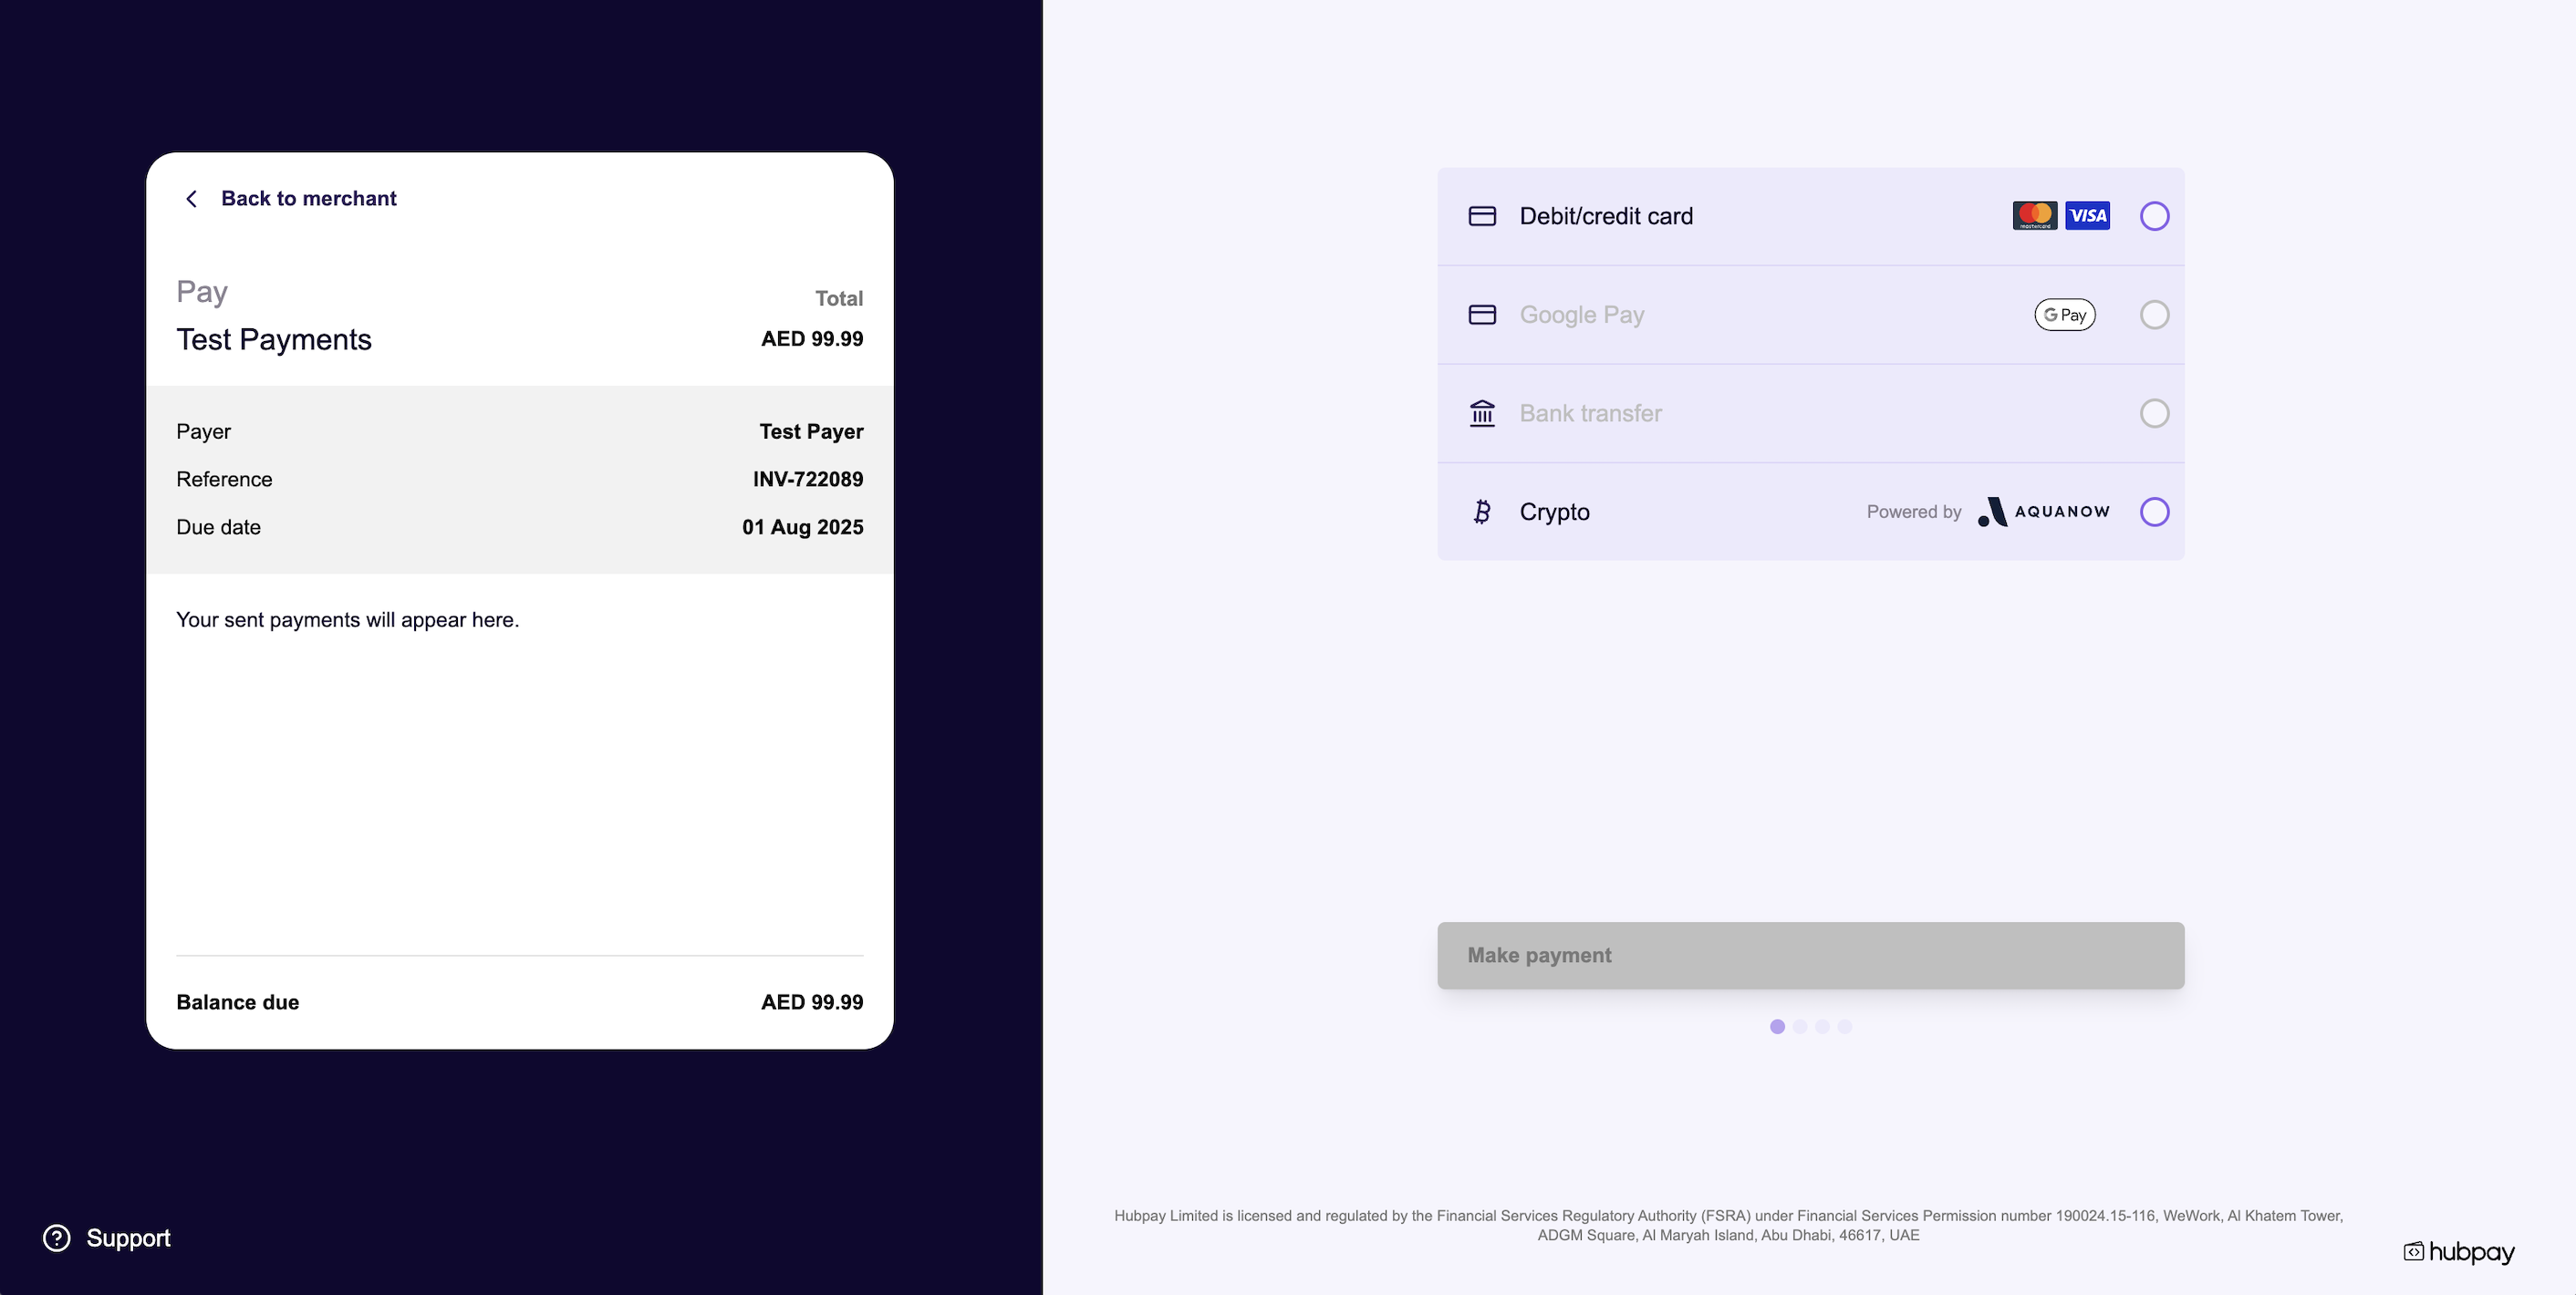
Typically, the customer is redirected after clicking a “Pay” button or completing their payment confirmation.
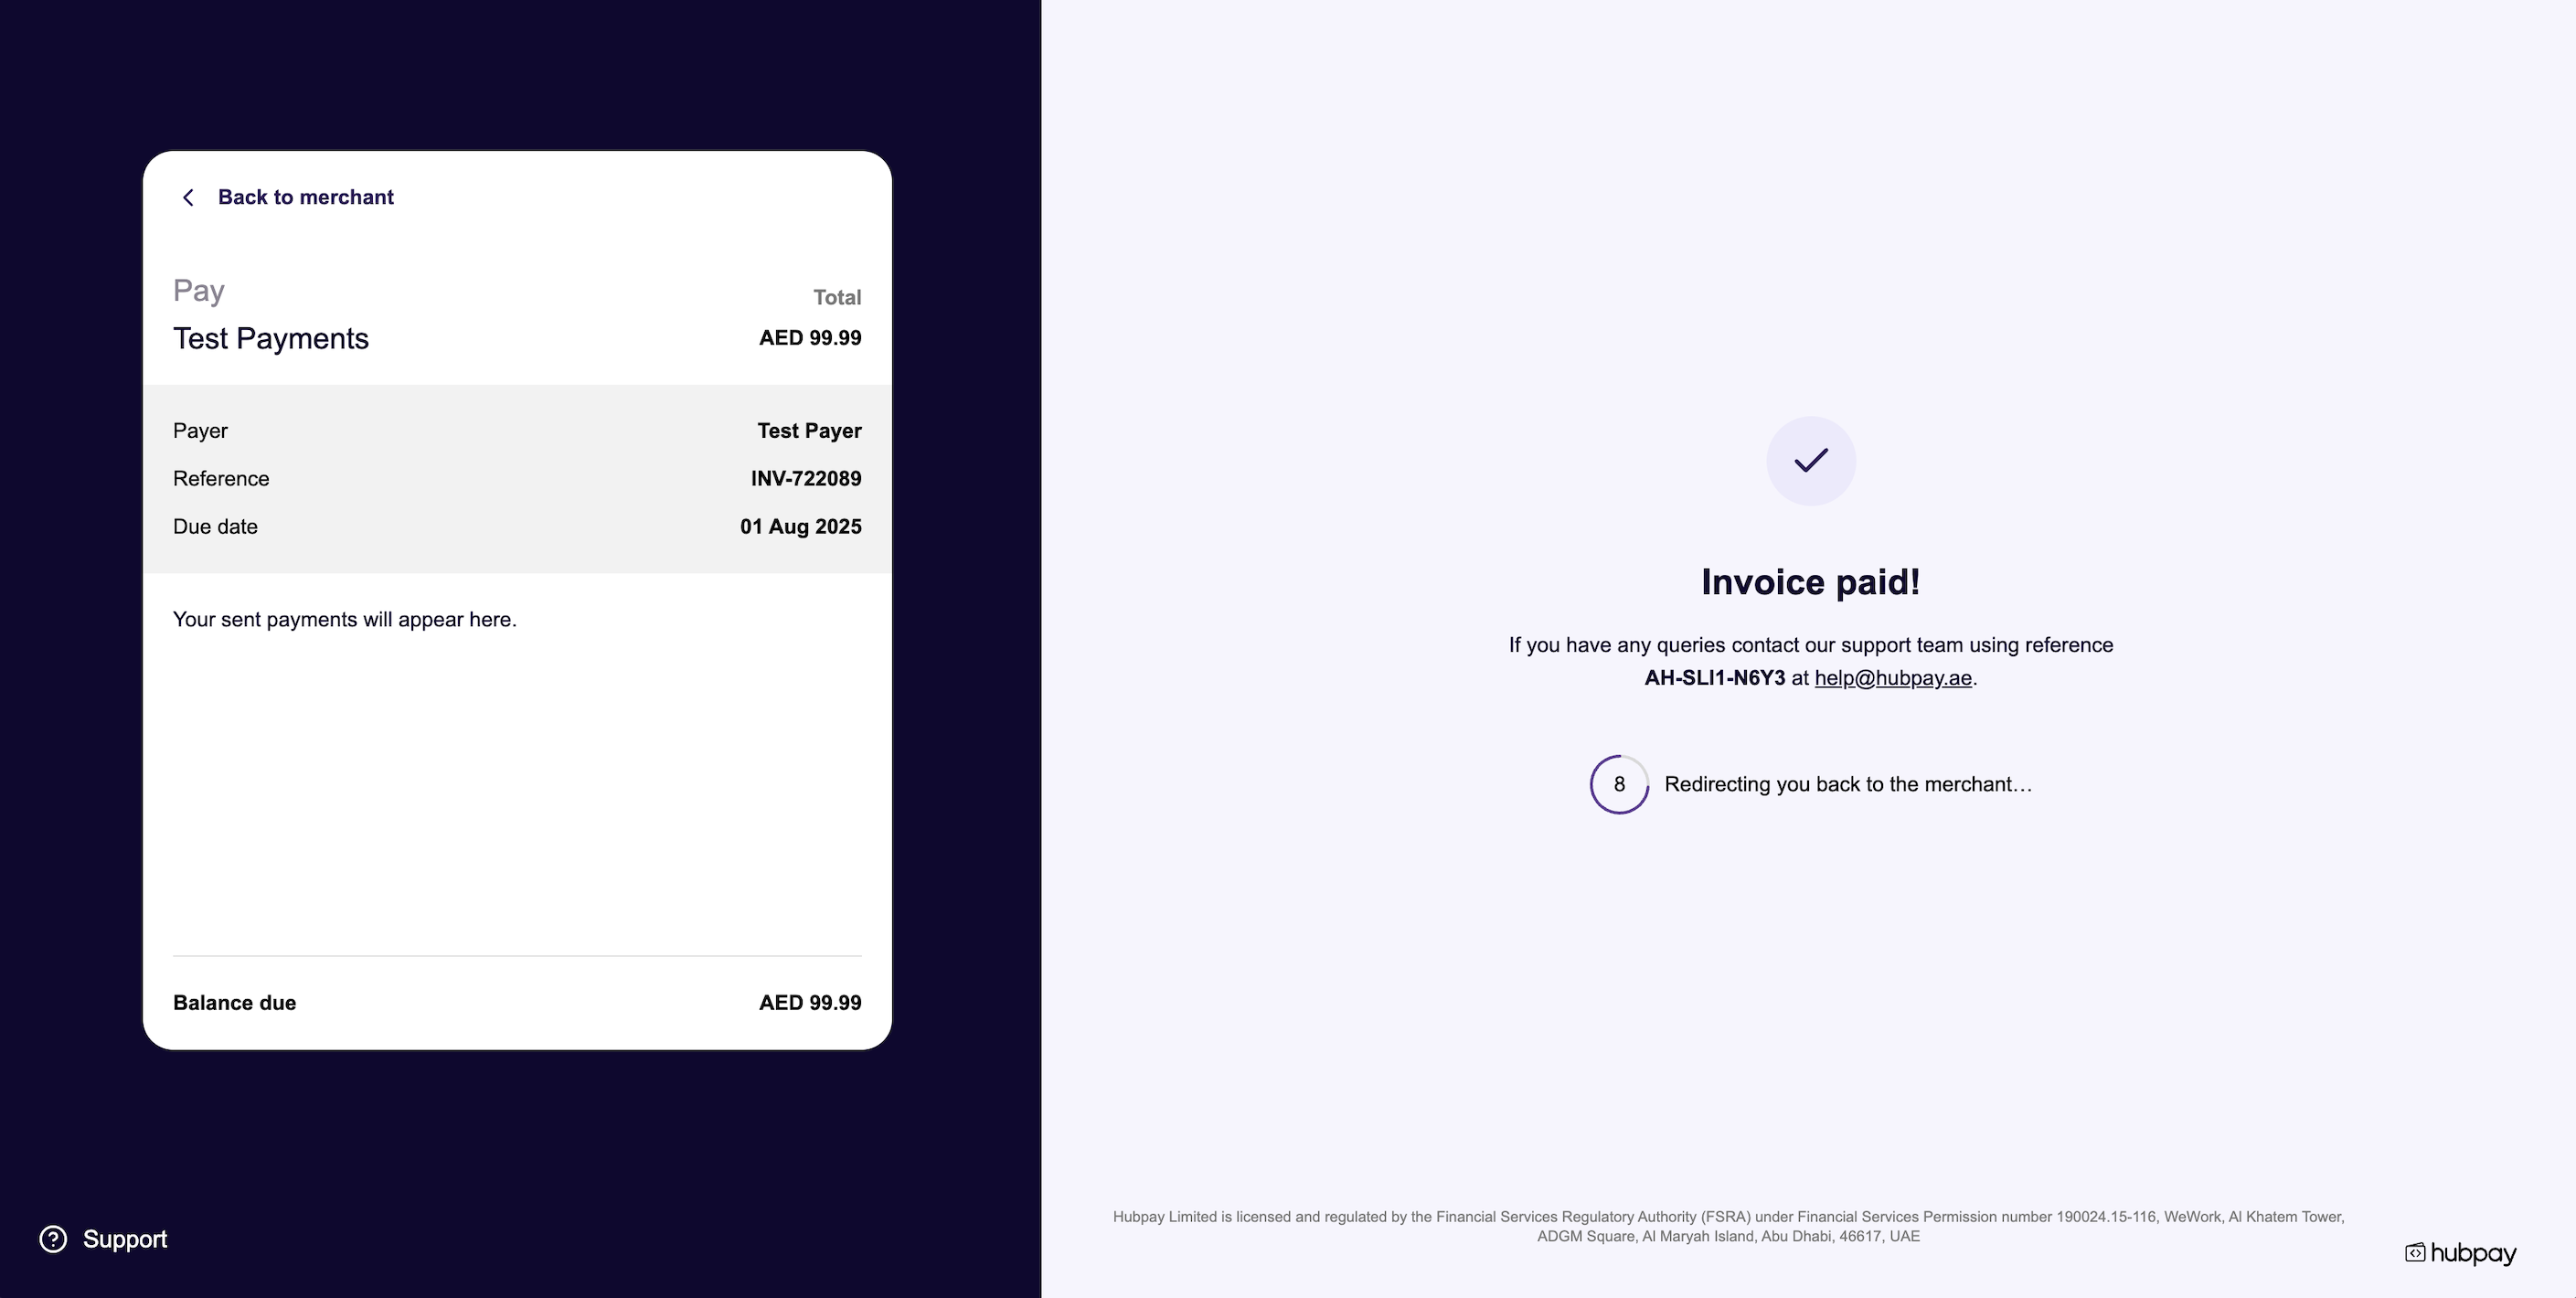
4. Handle redirect result
After the payment attempt, the customer will be redirected to one of the URLs you specified:
| Outcome | Description |
|---|---|
successRedirectUrl | Payment was completed successfully. Hubpay will append the paymentRequestId and paymentId as query parameters so your backend can validate the result. |
cancelRedirectUrl | Customer cancelled or abandoned the payment flow |
📱 In React Native a redirect will not occur – instead you would handle the response using the handleMessage function referenced above:
const handleMessage = (event) => {
  try {
    const message = JSON.parse(event.nativeEvent.data);

    switch (message.type) {
      case "success": {
        return void navigation.replace("PaymentSuccessScreen", {
          paymentId: message.payload.paymentId,
          paymentRequestId: message.payload.paymentRequestId,
        });
      }

      case "cancel": {
        return void navigation.replace("PaymentCancelledScreen");
      }
    }
  } catch (error) {}
};
5. (Optional) Customize branding
You can update the branding of your hosted payment page to align with your platform’s look and feel.
This includes:
- 🎨 Primary and secondary color (hex format)
- 🖼️ Logo upload (e.g. your company logo)
📘 View API Reference → Update Branding
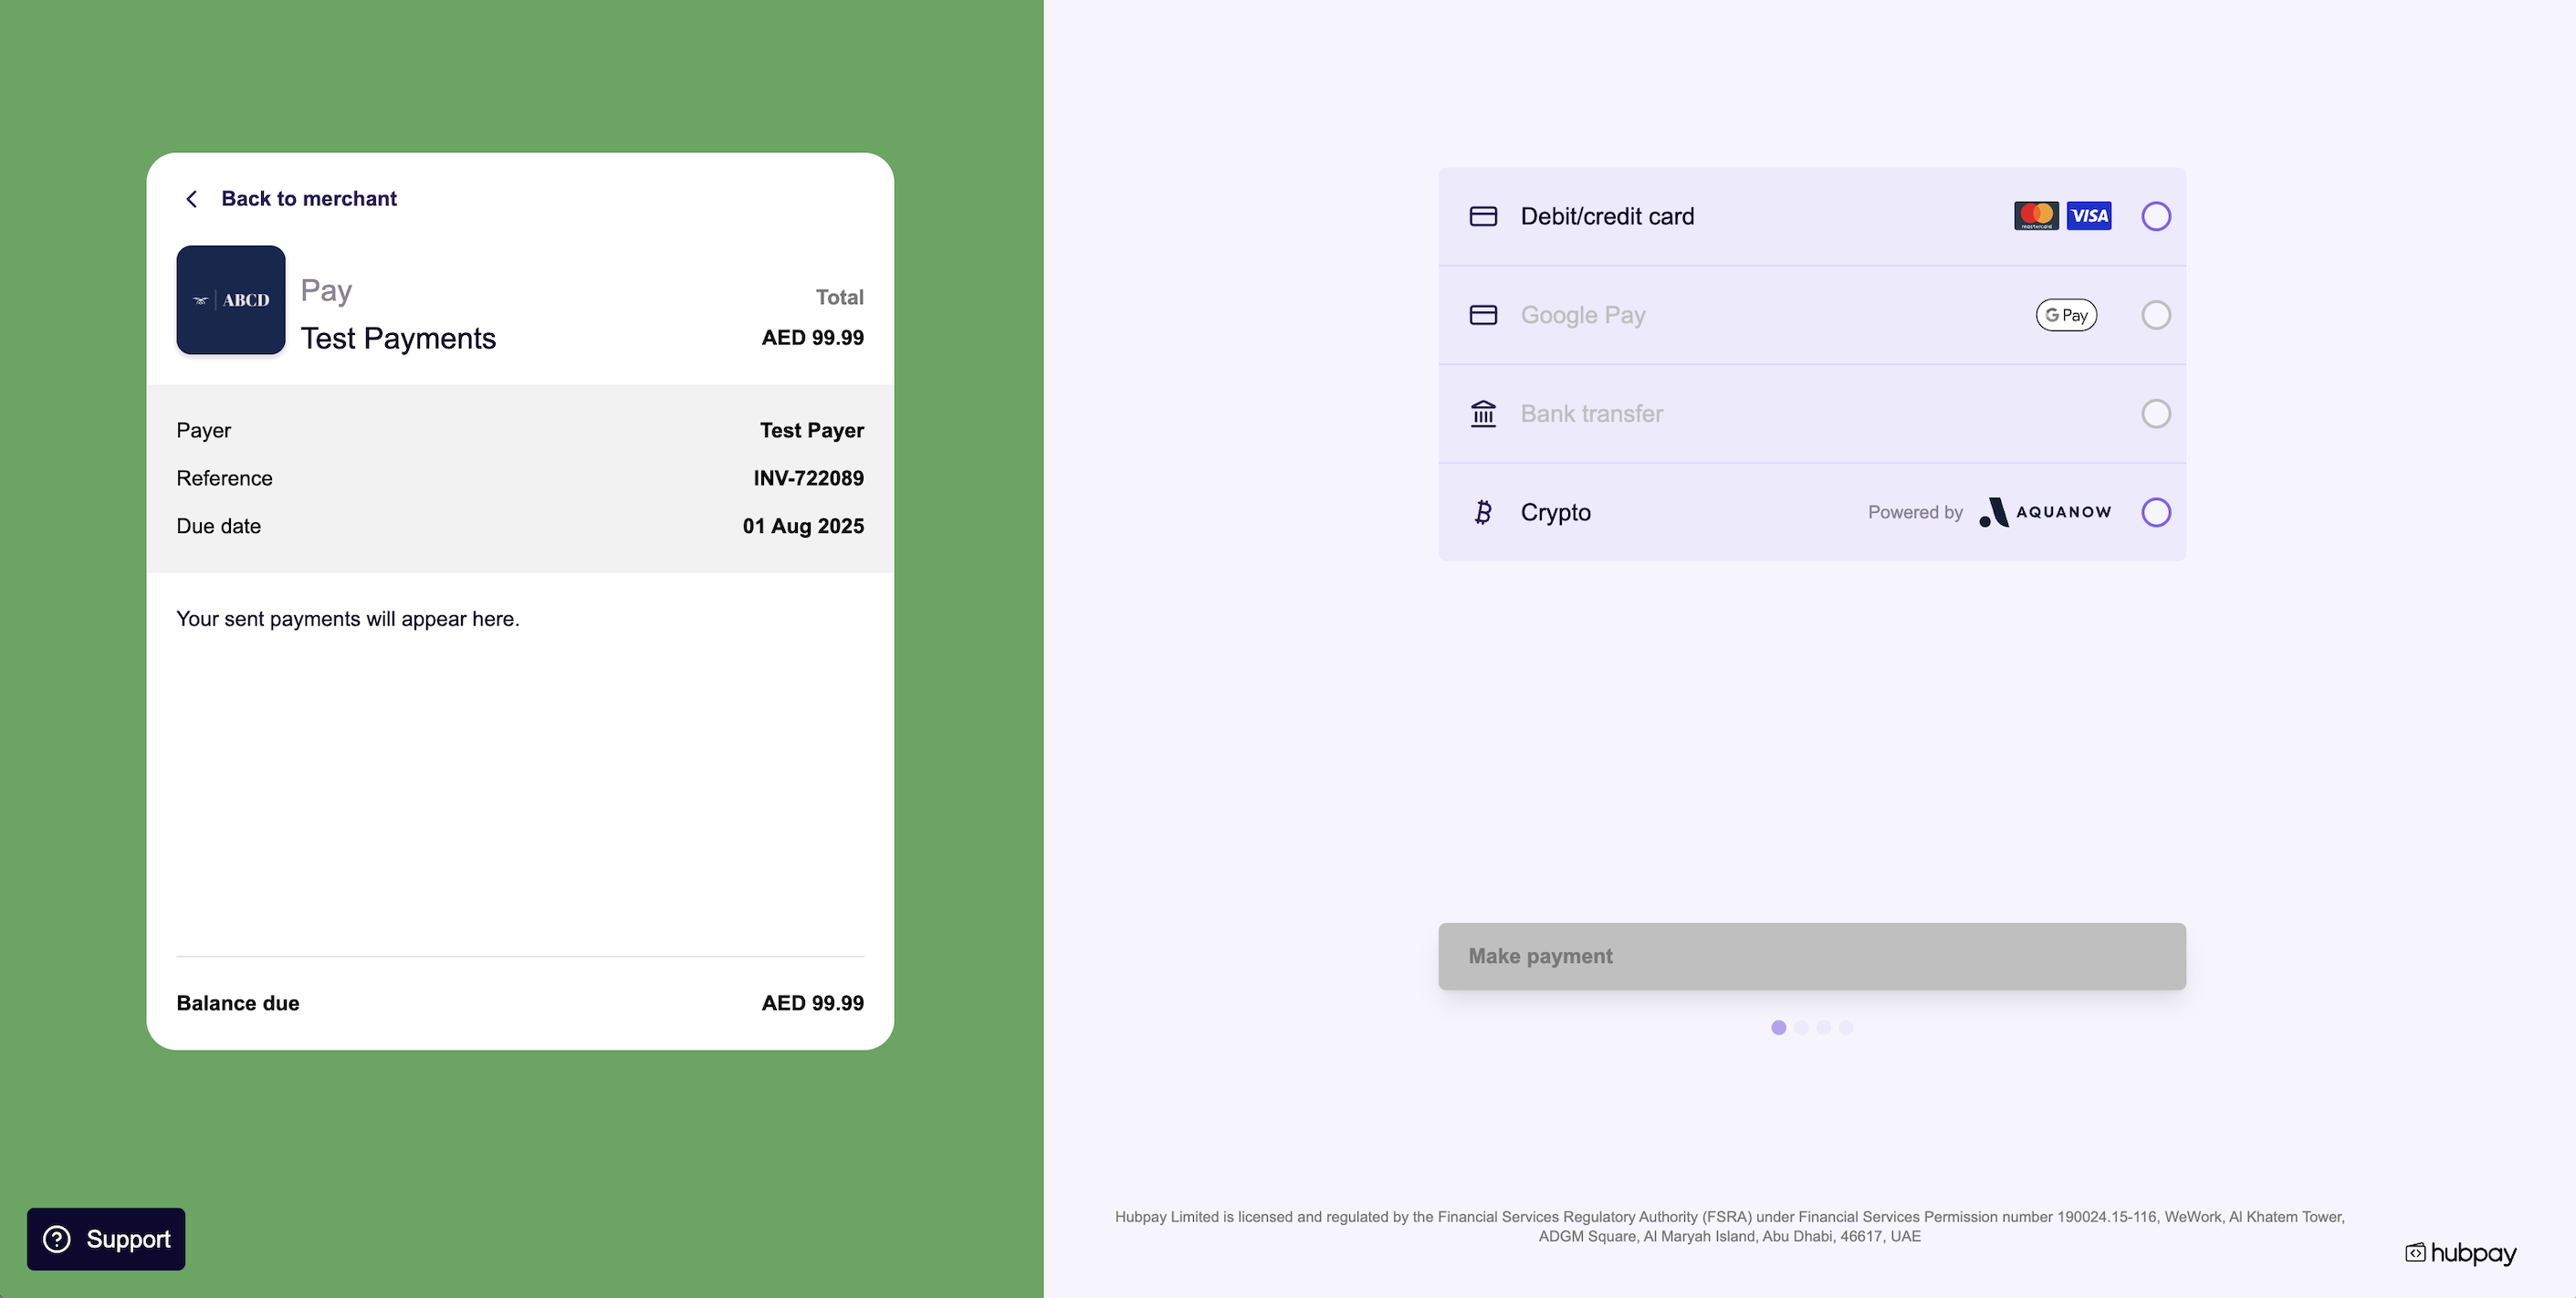
💡 All fields are optional — any provided value will be applied to your hosted payment pages.
6. (Optional) Listen for webhooks
To track the full backend lifecycle of a payment (including partial payments or cancellations), subscribe to our webhooks.
Common Events:
v1.collection.payment_request.createdv1.collection.payment_request.paidv1.collection.payment_request.part_paidv1.collection.payment_request.cancelled
📘 View the Webhook Guide for event payloads, retry behavior, and setup instructions.
Need help? Contact our team or review the API Reference for more technical details.